

Ninety-nine percent of people who are reading this article want to become a professional freelancer or want to make money online. Everyone wants to make money online as a freelancer but they don’t know which is the best and real earning platform. Do you find that Upwork is a real platform? Yes, you think right. Upwork is the best marketplace for freelancers where people sell their services and make millions of dollars monthly. Upwork was founded in 1999 and later it was named Upwork in 2015.
20 Steps To Create a New Professional Upwork Account:
In this article, I will help you to create a professional Upwork account. After reading this blog you will be able to make an account on Upwork which will help you to make money online by selling services. Following are the complete steps you have to follow to create an account in Upwork in 2024. Working on Upwork can make you successful and able you to earn money daily. You can start your profession as a freelancer on Upwork.
Following are the steps and tips to help you to create an account on Upwork.
Step 1 (Create Upwork account)
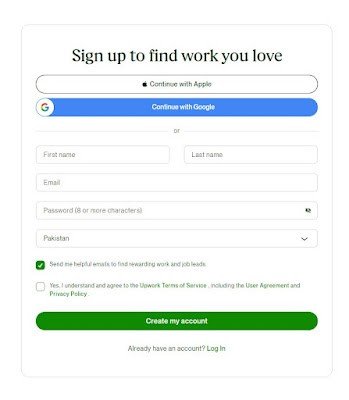
Open the Upwork website and click on the sign-up button. You can open Upwork by this address ( www. Upwork .com ) and press enter.

Step 2 (Signup for Upwork account)
You will find the sign-up button in the right top corner. Press on it and you will have a new pop-up form for creating an Upwork account.
Note: If you already have an account then login is no need to sign in. You can also sign up using a Google account.
Step 3:
After signing in, Fill in the following details. You have to save this detail for login and security purposes.
- Enter your email address
- Enter your first name and last name
- Click Get Started for the next step
Step 4:
Select the country where you live from the details. Click the drop-down tab and find your country of residence.
Note: you have to select the country where you are living. Upwork will verify yours later.
Step 5:
Create your password for your new Upwork account because you are creating a new Upwork account.
Note: The password should be strong to keep your account safe from hackers.
Step 6:
Now you have to select your category of work. Select “work as a freelancer” if you want to earn money or “hire for the project” if you are a buyer.
“work as a freelancer” you can find jobs and become a freelancer

Step 7:
This is the most important step while opening your new Upwork account.
Create your attractive username which will show your skill and your name.
Step 8:
After completing the above details you have to Complete the captcha task as given on your screen. Read the text from the given image and type it in the given box.
Step 9:
You have to agree to the Upwork TOS, terms of services, and conditions to continue the Upwork signup form. Tab yes means you agree to all Upwork demands and conditions. If you go against their policies you may ban them from Upwork. So before continuing real all Upwork TOS. Make sure you have read all policies, conditions, and terms of services of Upwork before continuing.
Step 10:
After completing all the above details you have to verify your email address to start creating a profile on Upwork. When you have submitted your details you will get a link and click on it to verify your account.
Step 11:
Now you have to select your field of work. What services you will offer to your client? Click the drop-down button and find it. You can select up to 4 files of your interest or you have the skill
Step 12:
Now you have to select the skills that will sell on Upwork as a freelancer. This is an important step in creating an Upwork account in 2024. Click on the skill to add to your bio.
Step 13:
In this step of creating an Upwork account, you have to select your work experience. According to my recommendation always select the expert tab
Step 14:
After Completing all the above details click on the “save & continue” button for the next steps.
Step 15:
Complete the following details
- Upload your professional profile picture. Use your image to look professional and real
- Create your professional title for your Upwork profile
- Add your complete details about your work experience, skills, and how you will work for clients
- Add your education and your work details.
Step 16:
Now you have to add your level of English proficiency. If you are native in English add native or add fluent or basic.
Note: If you are not native then add an expert.
Step 17:
This is also one of the most important steps in creating an Upwork account in 2024. Select your hourly rate. I recommend adding $5 as a new seller on Upwork.
Step 18:
Select your weekly availability level. Recommended adding “As needed open to offers”
Step 19:
Complete your details. Add your home address which is mentioned on your identity. Add your city name and postal code.
Step 20:
After completing all the above details while opening a new Upwork account in 2024 click on review application, Recommend checking details before applying for review and submitting your application.
The above are the 20 best Steps To Create An Upwork Account.
Related FAQs
Can I create a free account on Upwork?
Yes, you can create an Upwork account for free but you have to pay to Upwork buy connections. After creating a new Upwork account you will give some connections for free.
Is Upwork good for new sellers?
Yes, it is good but you have to get the knowledge of how to write a professional proposal that attracts clients. You can learn it from the above-given link.
How much can I earn from the Upwork marketplace?
Upwork is a platform where you can earn an hourly base as well as project bast. You can earn up to $100 per hour which depends on your skill and at least you can earn $1 per hour.
How can I withdraw my payment from Upwork?
Following are the methods of payments
- Bank transfer
- Payoneer
Thank you for reading this blog, if you have questions then comment to us, you can follow me on Instagram, Facebook, YouTube, and Tiktok with the name @iamahsan116
I wanted to express my gratitude for your insightful blog post. Your ability to break down complex topics into easily understandable content is commendable. Thanks for sharing your expertise!
Thanks I have recently been looking for info about this subject for a while and yours is the greatest I have discovered so far However what in regards to the bottom line Are you certain in regards to the supply
Usually I do not read article on blogs however I would like to say that this writeup very compelled me to take a look at and do so Your writing taste has been amazed me Thanks quite nice post
Alanna Gillespie
Its like you read my mind You appear to know so much about this like you wrote the book in it or something I think that you can do with a few pics to drive the message home a little bit but other than that this is fantastic blog A great read Ill certainly be back
Ava Klein
Sabrina Duffy
Virginia Marquez
Opal Morrow
kohlby felippo
Eden Schultz
Thank you for the amazing blog post!
wlcome